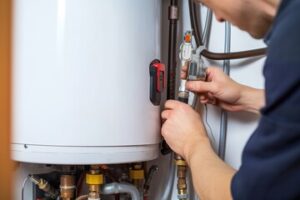
Your water heater is a vital part of your home that supplies hot water for all your household appliances. If it is broken or not working correctly, a professional plumber specializing in Water Heater Repair can help you diagnose the problem and find the best solution.
Signs of trouble include not having enough hot water, a strange smell, and discolored water.
The thermocouple is a crucial component of your water heater. It is responsible for keeping your pilot light lit, and it helps to keep your family safe. If the thermocouple fails, it can cause your pilot light to go out frequently. This can lead to the gas valve shutting off, which could potentially create a dangerous situation for your family. If you suspect that your thermocouple is failing, it’s important to have a professional inspect and repair it as soon as possible.
The most common sign of a failed thermocouple is when your water heater fails to heat up the water. This is because the pilot light is not getting enough heat from the flame, and it is unable to ignite. The thermocouple also sends a signal to the gas valve when it is not heated enough, which results in the water heater shutting off.
In order to correct this problem, you can turn off the gas supply to the water heater and remove the old thermocouple. Then, you can attach the new one and reconnect the gas supply. It’s important to follow the manufacturer’s instructions or a step-by-step repair guide when performing this task. This will ensure that the repair process is done properly and safely.
Before you replace the thermocouple, make sure it’s completely clean. You can use a lint-free cloth to wipe it down and remove any buildup or dust. You should also check for signs of corrosion, especially where the power wire connects to the terminal. If you see any of these issues, you should clean it thoroughly with emery cloth sandpaper.
You should also check to see if the thermocouple is bent. If the tip is too far from the pilot light flame, it will not be able to sense the heat. If this is the case, you can bend it slightly to correct the issue. However, it’s important to remember that you should always turn off the gas before attempting this step.
Once you have replaced the thermocouple, you can reattach the burner assembly and turn the gas back on. Be sure to follow the water heater lighting instructions to prevent gas leaks. You can also test for any gas leaks by putting soapy water into joints around the pilot light and burner. If you see bubbles, you should turn off the gas immediately and tighten the fittings.
Dip Tube
A water heater dip tube is a vital component of your home’s hot water system. Crafted from durable plastic or corrosion-resistant metals, its mission is to channel incoming cold water down toward the bottom of the tank, where it will be heated by the electric heating element or gas burner. This strategic delivery prevents rapid mixing of cold and hot water within the tank, maximizing efficiency by maintaining temperature stratification.
As such, a broken or leaking dip tube can quickly lead to decreased supply of hot water for your household, especially if you run multiple showers and tubs simultaneously. Fortunately, a new dip tube is relatively inexpensive and easy to replace.
When a dip tube experiences problems, it is typically due to repeated cycles of thermal expansion and contraction that cause the materials to crack or break. However, issues with water quality may also lead to dip tube deterioration. Water with high mineral content or acidity can accelerate chemical corrosion of the tube, leading to premature failure.
If you are experiencing a problem with your dip tube, it is important to consult an experienced plumber. Todd Water Heaters technicians can identify and resolve issues with your water heater’s dip tube promptly and efficiently, returning you to your full supply of hot water for your home or business.
The first step in fixing a dip tube is shutting off the circuit breaker that delivers power to your water heater and opening the drain valve at the bottom of the tank. It is important to drain the water heater completely, as a small amount of water still in the tank can cause the dip tube to become brittle over time. Once the water has been drained, you will need to disconnect the water supply line and garden hose from the inlet port at the top of the tank, then remove the old dip tube with a wrench.
Once you have a replacement dip tube in hand, it is as simple as reconnecting the supply and drain lines and turning on the power or gas to your water heater. You will want to flush the tank afterwards, as this can help remove any sediment that has accumulated, which may contribute to the performance of your new dip tube.
Pressure Valve
The pressure-relief valve, sometimes called a water heater safety valve, is an important part of your tank water heater that protects against overheating and excessive pressure. This safety valve is located on the side or top of your water heater and includes a tube that extends about six inches above the floor. If the temperature or pressure inside your tank rises too high, the valve will open to discharge the excess water into the discharge tube to prevent a catastrophic tank burst and resulting flooding of your home.
The valve will only work properly if it is regularly tested and maintained. It is recommended that you test your water heater relief valve at least once per year by lifting the lever and observing the results. This testing will help ensure that your valve can effectively relieve excess pressure and does not need to be replaced or repaired.
In order to test your valve, you will need a bucket to catch the water that will be released when you open the lever. Position the bucket under the discharge pipe and carefully lift the lever. If water flows from the valve and into the bucket, it is functioning correctly and you can repeat this process every year to test your valve.
If the valve fails to operate correctly or you notice any signs of damage, rust or debris in the discharge tube, it will need to be replaced. You should have this done by a professional plumber to ensure it is installed correctly and that the new valve can be relied upon to operate as intended.
The valve should also be inspected AT LEAST ONCE PER YEAR by a qualified service technician or licensed plumbing contractor to assure that the discharge line and valve are free of corrosive conditions and have not been altered or tampered with illegally. If the lever is operated and no hot water discharges, it may be a sign that naturally occurring mineral deposits are blocking the valve’s waterways and rendering the valve inoperable. This can lead to an unsafe temperature and pressure build-up and could result in serious injury or death or severe property damage.
Pilot Light
The pilot light serves an important function in your water heater and other gas appliances. If it goes out, the problem can be troublesome and frustrating. The good news is that the causes of a pilot light that won’t stay lit are generally pretty easy to solve.
One of the most common reasons for a pilot light to go out is due to air around it that interferes with the flame. If there is a draft that is coming from the room where your water heater is, it can disrupt the flame and eventually blow it out. It’s important to examine the area for drafts and to find a way to fix the issue.
Another issue that can prevent a pilot light from staying lit is a dirty pilot tube. This happens over time and can result in a blockage that stops the flow of gas to the flame. It’s a good idea to clean the pilot tube periodically to help avoid this issue.
A faulty thermocouple can also impact the pilot light. This is a safety feature that can sometimes malfunction, so it’s a good idea to call in a professional technician to inspect and replace it if necessary.
Finally, it’s possible that your gas valve is not in the “on” position. This can stop the flow of gas to the pilot light, so it’s a good idea for homeowners to ensure that the valve is correctly set.
The pilot light is an essential part of your water heater and other gas appliances, but it’s not impossible for it to stop working. These issues can be hard to pinpoint, but the tips in this article can help you determine the source of your pilot light problem and get it fixed quickly. Remember to always use caution when dealing with electricity, and never touch a running appliance. It’s also a good idea to contact a professional if you are unsure of what is wrong or are uncomfortable doing an advanced repair. Trying to fix advanced problems without proper training can be dangerous and lead to expensive repairs.